Microscopy – 5 Reasons Coverslips Are Important For High-Quality Imaging

Most people are familiar with coverslips being placed on slides to protect the sample, but that’s not the only reasons that coverslips are important.

They also affect the image quality.

Coverslips function by working with your microscope to focus light to a single point and avoiding unnecessary noise in your image.

Having the wrong type of coverslip will damage the quality of your images and the quality of the data you extract from those images.

So today, we will discuss five reasons why coverslips, and utilizing the right ones, will improve your imaging…

1. Objectives expect there to be a coverslip in the light path.

Objectives are designed to compensate for a coverslip in the light path, and specifically for a 0.17mm thick glass to be in the light path.

This correlates with a number 1.5 coverslip.

You will also find number 1 (0.15mm) and number 2 (0.22mm) coverslips available for sale, but those will not be as effective.

If you check out the Nikon website MicroscopyU, you will see the objective with a numerical aperture of 0.95 will diminish the brightness by almost 80% when there is a variance of only 0.03mm, or a 30 micrometer deviation. Using a #1 coverslip can significantly reduce the brightness of your sample.

Also important to note is that different brands and lines within the brands have different allowable variance within their coverslips, and this becomes important when we’re using high numerical aperture lens or when performing co-localization experiments.

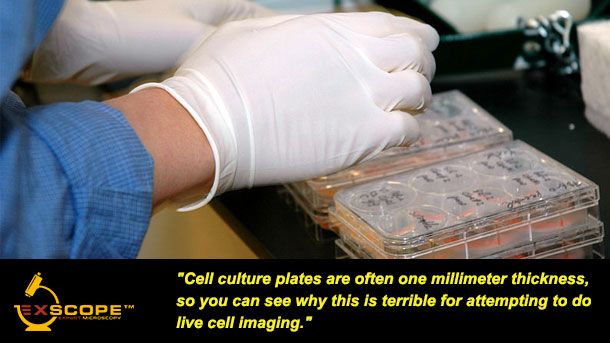
Cell culture plates are often one millimeter thickness, so you can see why this is terrible for attempting to do live cell imaging, or any imaging other than showing the health of your cells.

2. Refractive index is also compensated for within the light path of the objectives.

The refractive index of glass is approximately 1.5, while polystyrene, the most common plastic for tissue culture plates is 1.6.

When we have this mismatch in refractive index, we lose a lot of light through unmatched refraction angles.

This diminishes our signal, so the image becomes more unclear.

You want to get the clearest and most detailed images possible, and to do that you need to ensure that your refractive indexes match up.

This means using plastic tissue culture plates as your imaging coverslip is a bad idea.

3. Thick coverslips take up too much of your working distance.

Many high numerical aperture lenses have a very small working distance where it might only be 300 micrometers or less.

Now, if our coverslip is taking up too much of that, we may not be able to focus through that to our sample.

Similarly, if we have a tissue culture plate that may be one millimeter thick, we physically will not be able to focus through the plate to get to the sample and have an in-focus image.

Too many times, I have seen users put time and resources in preparing their samples, only to find they can’t even focus on their sample.

Why waste your time and money on something as simple as a sample carrier?

Plan ahead and get the right type of coverslip so you can get the images you need the first time.

4. Plastics are depolarizing and light scattering.

This is why we cannot use plastic for DIC imaging, because plastics are depolarizing and scatter light.

If you have apolarizers in a light path you will see rainbows from the stress upon the plastic as well as it will scatter light in many directions, again, losing a loss of signal.

So you end up using more laser power.

But Because you have to up the laser power you might not be able to achieve a good enough signal to noise to have a good image.

5. Plastics introduce autofluorescence.

Many plastics are autofluorescent.

Therefore when we shine a light on the plastic, additional light gets sent back from the sample carrier.

So, if you are trying to get an image of a fluorescent tag or protein in your cells, the autofluorescence of the plastic is going to interfere.

The plastic introduces extra noise into your image and this degrades the quality of the image of your sample.

Which leads to poor results and ultimately a waste of time and money.

It is important to consider the type of coverslip that you are using in your microscopy experiments. Using the wrong kind can have a detrimental effect on the quality of your results. A few of the reasons that the wrong type of coverslip will ruin your experiments are objectives expect there to be a coverslip in the light path, refractive index is also compensated for within the light path of the objectives, thick coverslips take up too much of your working distance, plastics are depolarizing and light scattering, and plastics introduce autofluorescence. Before your next microscopy experiment, double check that you are using the right kind of coverslip.

To learn more about Microscopy – 5 Reasons Coverslips Are Important For High-Quality Imaging, and to get access to all of our advanced microscopy materials including training videos, presentations, workbooks, and private group membership, get on the Expert Microscopy wait list.

Join Expert Cytometry's Mastery Class

ABOUT HEATHER BROWN-HARDING

Heather Brown-Harding, PhD, is currently the assistant director of Wake Forest Microscopy and graduate teaching faculty.She also maintains a small research group that works on imaging of host-pathogen interactions. Heather is passionate about making science accessible to everyone.High-quality research shouldn’t be exclusive to elite institutions or made incomprehensible by unnecessary jargon. She created the modules for Excite Microscopy with this mission.

In her free time, she enjoys playing with her cat & dog, trying out new craft ciders and painting.You can find her on twitter (@microscopyEd) a few times of day discussing new imaging techniques with peers.

Heather Brown-Harding

Similar Articles

Which Fluorophores To Use For Your Microscopy Experiment

Which Fluorophores To Use For Your Microscopy Experiment

By: Heather Brown-Harding, PhD

Fluorophore selection is important. I have often been asked by my facility users which fluorophore is best suited for their experiments. The answer to this is mostly dependent on whether they are using a widefield microscope with set excitation/emission cubes or a laser based system that lets you select the laser and the emission window. Once you have narrowed down which fluorophores you can excite and collect the correct emission, you can further refine the specific fluorophore that is best for your experiment.  In this blog  we will discuss how to determine what can work with your microscope, and how…

4 No Cost Ways To Improve Your Microscopy Image Quality

4 No Cost Ways To Improve Your Microscopy Image Quality

By: Heather Brown-Harding, PhD

Image quality is critical for accurate and reproducible data. Many people get stuck on the magnification of the objective or on using a confocal instead of a widefield microscope. There are several other factors that affect the image quality such as the numerical aperture of the objective, the signal-to-noise ratio of the system, or the brightness of the sample.  Numerical aperture is the ability of an objective to collect light from a sample, but it contributes to two key formulas that will affect your image quality. The first is the theoretical resolution of the objective. It is expressed with the…

What Is Total Internal Reflection Fluorescence (TIRF) Microscopy & Is It Right For You?

What Is Total Internal Reflection Fluorescence (TIRF) Microscopy & Is It Right For You?

By: Heather Brown-Harding, PhD

TIRF is not as common as other microscopy based techniques due to certain restrictions. We will discuss these restrictions, then analyze why it might be perfect for your experiment.  TIRF relies on an evanescent wave, created through a critical angle of coherent light (i.e. laser) that reaches a refractive index mismatch.  What does it mean in practice?  A high angle laser reflects off the interface of the coverslip and the sample. Although the depth that this wave penetrates is dependent on the wavelength of the light, in practice it is approximately 50-300nm from the coverslip. Therefore, the cell membrane is…

5 Drool Worthy Imaging Advances Of 2020

5 Drool Worthy Imaging Advances Of 2020

By: Heather Brown-Harding, PhD

2020 was a difficult year for many, with their own research being interrupted- either by lab shutdowns or recruitment into the race against COVID-19. Despite the challenges, scientists have continued to be creative and have pushed the boundaries of what is possible. These are the techniques and technologies that every microscopist was envious of in 2020. Spatially Resolved Transcriptomics Nature Methods declared that spatially resolved transcriptomics was the 2020 method of the year. These are a  group of methods that combine gene expression with their physical location. Single-cell RNA sequencing (scRNAseq) was originally developed for cells that had been dissociated…

Picking The Right Functional Imaging Probe

Picking The Right Functional Imaging Probe

By: Heather Brown-Harding, PhD

As biologists, we study the process of life, however, it’s intricacies cannot be captured by a snapshot in time. Generally, the easiest imaging experiments are those where the samples are stained, fixed, and imaged within a few days of procurement, but that too doesn’t capture the dynamic processes common in cells and organisms. Live cell imaging when combined with reporters serves as a powerful tool to provide solid imaging data. Cameleon —one of the first reporters— was developed in 1997 in Roger Tsien’s lab.  Cameleon is a green fluorescent protein (GFP) that undergoes a conformational change in the presence of…

7 Key Image Analysis Terms For New Microscopist

7 Key Image Analysis Terms For New Microscopist

By: Heather Brown-Harding, PhD

As scientists, we need to perform image analysis after we’ve acquired images in the microscope, otherwise, we have just a pretty picture and not data. The vocabulary for image processing and analysis can be a little intimidating to those new to the field. Therefore, in this blog, I’m going to break down 7 terms that are key when post-processing of images. 1. RGB Image Images acquired during microscopy can be grouped into two main categories. Either monochrome (that can be multichannel) or “RGB.” RGB stands for red, green, blue – the primary colors of light. The cameras in our phones…

The 5 Essentials To Successful Spectral Unmixing

The 5 Essentials To Successful Spectral Unmixing

By: Heather Brown-Harding, PhD

In an ideal world, we would be able to use fluorophores that don’t have any overlap in emission spectra and autofluorescence wouldn’t obscure your signal. Unfortunately, we don’t live in such a world and often have to use two closely related dyes – or contend with fluorescent molecules that are innately part of our sample. Fluorescent molecules include chlorophyll, collagen, NADPH, and vitamin A.  One example that I recently encountered was developing a new probe for lipids. The reviewers requested a direct comparison of the new dye to Nile Red in the same sample. Both dyes would localize to the…

The 5 Fundamental Methods For Imaging Nucleic Acids

The 5 Fundamental Methods For Imaging Nucleic Acids

By: Heather Brown-Harding, PhD

There are 4 major ways to sort cells. The first way can use magnetic beads coupled to antibodies and pass the cells through a magnetic field. The labeled cells will stick, and the unlabeled cells will remain in the supernatant. The second way is to use some sort of mechanical force like a flapper or air stream that separates the target cells from the bulk population. The third way is the recently introduced microfluidics sorter, which uses microfluidics channels to isolate the target cells. The last method, which is the most common––based on Fuwyler’s work––is the electrostatic cell sorter. This…

Designing Microscopy Experiments Related To Infectious Diseases And Antivirals

Designing Microscopy Experiments Related To Infectious Diseases And Antivirals

By: Heather Brown-Harding, PhD

There are 4 major ways to sort cells. The first way can use magnetic beads coupled to antibodies and pass the cells through a magnetic field. The labeled cells will stick, and the unlabeled cells will remain in the supernatant. The second way is to use some sort of mechanical force like a flapper or air stream that separates the target cells from the bulk population. The third way is the recently introduced microfluidics sorter, which uses microfluidics channels to isolate the target cells. The last method, which is the most common––based on Fuwyler’s work––is the electrostatic cell sorter. This…

Top Industry Career eBooks

Get the Advanced Microscopy eBook

Get the Advanced Microscopy eBook

Heather Brown-Harding, PhD

Learn the best practices and advanced techniques across the diverse fields of microscopy, including instrumentation, experimental setup, image analysis, figure preparation, and more.

Get The Free Modern Flow Cytometry eBook

Get The Free Modern Flow Cytometry eBook

Tim Bushnell, PhD

Learn the best practices of flow cytometry experimentation, data analysis, figure preparation, antibody panel design, instrumentation and more.

Get The Free 4-10 Compensation eBook

Get The Free 4-10 Compensation eBook

Tim Bushnell, PhD

Advanced 4-10 Color Compensation, Learn strategies for designing advanced antibody compensation panels and how to use your compensation matrix to analyze your experimental data.